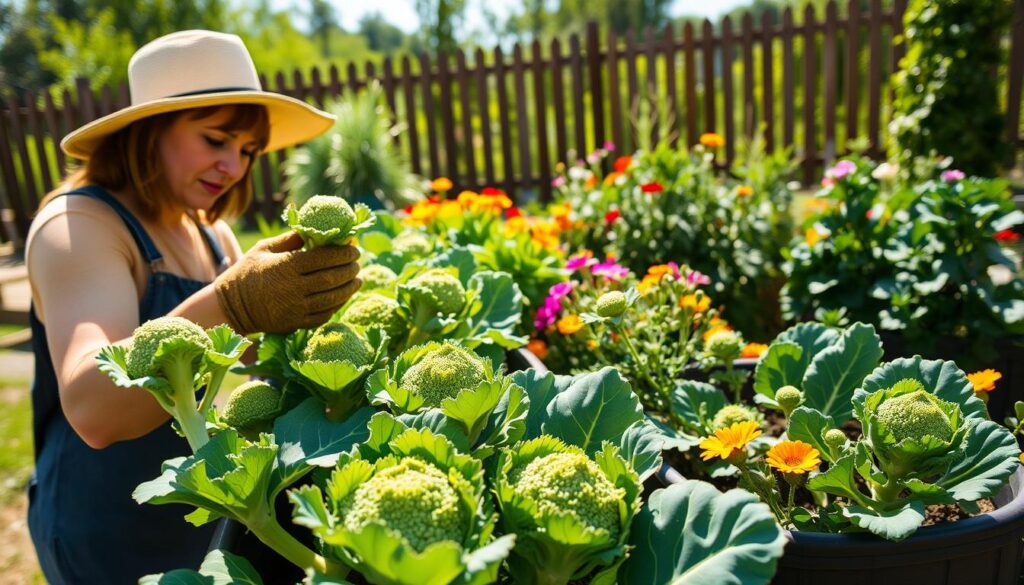
Did you know you can enjoy fresh, homegrown broccoli even without a traditional garden? Container gardening opens up a world of possibilities for anyone with limited space. Imagine stepping onto your balcony or patio and picking a vibrant, nutritious vegetable for dinner. It’s easier than you think!
Many people wonder, “Does broccoli thrive in pots?” The answer is a resounding yes! With the right care, you can cultivate healthy plants that produce firm, flavorful heads. Whether you’re a seasoned gardener or a beginner, this guide will walk you through every step, from selecting the perfect soil to harvesting your first crop.
Container gardening is not just practical—it’s rewarding. You’ll have full control over the growing conditions, ensuring your plants get the nutrients and sunlight they need. Plus, it’s a great way to add fresh, organic produce to your meals. Ready to get started? Let’s dive in!
Key Takeaways
- Container gardening is ideal for small spaces and urban environments.
- Broccoli thrives in pots with proper soil and sunlight.
- Harvesting your own produce ensures freshness and flavor.
- Regular watering and fertilization are key to healthy plants.
- This guide covers everything from planting to harvesting.
Introduction to Container Broccoli Gardening
Container gardening has transformed the way I enjoy fresh produce, even in small spaces. As a passionate gardener, I’ve found that cultivating vegetables like broccoli in pots is not only practical but also incredibly rewarding. Whether you have a tiny balcony or a compact patio, this method allows you to take control of your garden’s environment.
One of the biggest advantages of container gardening is its flexibility. You can move your pots to maximize sunlight or protect them from harsh weather. This level of control ensures your plants get the right amount of moisture, sun, and nutrients they need to thrive.
Many people ask, “Can I plant broccoli next to tomatoes?” While tomatoes and broccoli have different needs, they can coexist with proper spacing and care. However, avoid planting broccoli near other brassica family members like cabbage, as they share similar pests.
Here’s a quick comparison of ideal companions and plants to avoid:
| Good Companions | Plants to Avoid |
|---|---|
| Beans | Cabbage |
| Celery | Cauliflower |
| Potatoes | Strawberries |
Choosing the right variety is also crucial. Some types mature faster, making them ideal for shorter growing seasons. Others produce larger heads or more side shoots, giving you a continuous harvest.
In the following sections, I’ll guide you through selecting the perfect container, preparing the right soil, and ensuring your plants get the care they need. By the end, you’ll be ready to enjoy a bountiful harvest of fresh, homegrown broccoli.
Choosing the Right Container and Soil
The foundation of a thriving garden lies in the choices you make early on. Selecting the right container and soil is crucial for healthy plants and a bountiful harvest. Let’s explore how to set up your garden for success.
Selecting Containers for Broccoli
Choosing the right container is the first step. Broccoli plants need space for their roots to develop. A pot that’s at least 12 inches deep and 12 inches wide is ideal for a single plant. For multiple plants, go for a container that’s 24 inches wide.
Different materials have their pros and cons. Plastic pots are lightweight and affordable, while clay or ceramic pots are heavier but offer better insulation. Fabric pots are breathable and promote healthy root growth but may dry out faster.
Drainage is key. Ensure your container has holes at the bottom to prevent waterlogging. Adding a layer of gravel or small stones can improve drainage and keep roots healthy.
Soil Mix and Fertilizer Recommendations
The right soil mix is essential for your plants to thrive. Broccoli prefers well-draining soil with a pH between 6.0 and 7.0. A mix of peat moss, perlite, and vermiculite works well. Adding compost enriches the soil with nutrients.
Fertilization is equally important. Broccoli plants are heavy feeders. A balanced fertilizer with equal parts nitrogen, phosphorus, and potassium is ideal. Apply it once a month for best results.
Many gardeners ask, “What is the best fertilizer for broccoli?” A slow-release granular fertilizer or organic options like fish emulsion are excellent choices. Coffee grounds can also be sprinkled around the base of the plant to add nitrogen.
| Container Material | Pros | Cons |
|---|---|---|
| Plastic | Lightweight, affordable | Less durable |
| Clay/Ceramic | Better insulation | Heavy, fragile |
| Fabric | Breathable, promotes root health | Dries out quickly |
By choosing the right container and soil, you’re setting the stage for a successful gardening experience. With proper care, your plants will reward you with a healthy and abundant harvest.
Preparing for Planting Broccoli in Containers
Starting your broccoli journey indoors gives you a head start on the growing season. This method ensures your plants are strong and ready for outdoor conditions. Let’s walk through the steps to set you up for success.
Sowing Seeds and Transplanting Seedlings
I begin by planting seeds about ½ inch deep in a seed-starting mix. This mix provides the right balance of nutrients and drainage. Keep the soil moist but not waterlogged to encourage germination.
Once the seedlings have a few true leaves, I transplant them into larger pots. This step allows the roots to develop fully. Be gentle when handling the young plants to avoid damaging the delicate roots.
Timing Your Planting for Optimal Growth
Timing is crucial for a healthy harvest. I aim to start seeds indoors about six to eight weeks before the last frost date. This ensures the plants are ready to thrive in cooler weather.
Before moving seedlings outdoors, I harden them off. This process involves gradually exposing them to outdoor conditions over a week. It reduces shock and helps them adapt to their new environment.
Proper watering is essential during this stage. I check the soil daily to ensure it stays consistently moist. Overwatering can lead to root rot, while underwatering can stunt growth.
Preventing pests from the start is also important. I inspect the leaves regularly for signs of aphids or cabbage worms. Using organic methods like neem oil keeps the plants healthy without harsh chemicals.
By following these steps, you’ll set your broccoli plants up for a successful growing season. With the right care, you’ll enjoy a bountiful harvest in no time.
How to Grow Broccoli in Containers Successfully
Ensuring your plants thrive in pots requires attention to temperature, light, and water. These factors are critical for healthy growth and a bountiful harvest. Let’s dive into the specifics to help you succeed.
Optimal Temperature and Light Conditions
Broccoli prefers temperatures between 65-75°F for optimal growth. If it gets too hot, the plants may bolt, reducing the quality of the head. Cooler weather is ideal, especially during the early stages.
Light is equally important. Your plants need at least six hours of direct sunlight each day. If natural light is limited, consider using grow lights to supplement. This ensures the plant receives enough energy to develop strong stems and leaves.
Watering and Maintenance Best Practices
Watering is a balancing act. Too much water can lead to root rot, while too little can stunt growth. I check the soil daily and water deeply when the top inch feels dry. This method ensures the roots stay hydrated without becoming waterlogged.
Here’s a quick guide to watering frequency based on weather conditions:
| Weather | Watering Frequency |
|---|---|
| Hot and Dry | Every 2-3 days |
| Cool and Humid | Once a week |
| Rainy | Monitor soil moisture |
Regular maintenance is key. Inspect the leaves for signs of pest damage, such as holes or discoloration. Removing affected leaves early can prevent the spread of issues.
By maintaining the right temperature, providing adequate light, and watering correctly, you’ll set your plants up for success. These practices ensure a healthy harvest and encourage side shoots for continued growth.
Caring for Your Broccoli Container Garden
Maintaining a healthy container garden requires attention to both nutrients and pest control. Proper care ensures your plants remain vigorous and productive throughout the growing season. Let’s explore how to manage these two critical aspects effectively.
Nutrient Management and Fertilizing Tips
Broccoli plants are heavy feeders, meaning they require consistent nutrients to thrive. I use a balanced fertilizer with equal parts nitrogen, phosphorus, and potassium. Applying it once a month ensures steady growth and healthy development.
For organic options, compost or well-rotted manure works wonders. These natural fertilizers enrich the soil and improve its structure. I also sprinkle coffee grounds around the base of the plant to add nitrogen naturally.
Here’s a quick guide to my fertilizing schedule:
| Fertilizer Type | Application Frequency |
|---|---|
| Balanced Granular | Once a month |
| Compost | Every 6 weeks |
| Coffee Grounds | As needed |
Consistent nutrient management keeps the plant strong and encourages the development of a firm head.
Pest and Bug Prevention Strategies
Pests can quickly damage your garden if left unchecked. I regularly inspect the leaves for signs of aphids or cabbage worms. Early detection is key to preventing infestations.
Organic methods like neem oil are my go-to solution. It’s effective against a wide range of pests and safe for the plant. I also use insect-proof netting to protect the container from birds and caterpillars.
Here are some practical tips to keep bugs away:
- Check the leaves daily for holes or discoloration.
- Apply neem oil weekly as a preventive measure.
- Use companion planting to deter pests naturally.
By staying vigilant and using organic solutions, you can keep your garden healthy and pest-free.
With proper nutrient management and pest control, your container garden will thrive. These practices ensure a bountiful harvest and keep your plants vigorous throughout the season.
Harvesting Techniques for a Bountiful Yield
Timing is everything when it comes to picking the perfect head of broccoli. Harvesting at the right moment ensures the best flavor and encourages the plant to produce side shoots for extended yields. Let’s explore how to identify the ideal time and handle your harvest for maximum freshness.
When and How to Harvest Broccoli
The central head is ready when the buds are tight and deep green. If the buds start to loosen or turn yellow, it’s past its prime. I always check my plants every few days to catch the perfect moment.
To harvest, I use a sharp knife to cut the head about 5-6 inches below the stem. This technique encourages the plant to produce side shoots for a second harvest. It’s best to harvest early in the morning when the soil is cool to retain moisture and nutrients.

Post-Harvest Handling and Storage
After harvesting, I rinse the head in a mix of water and vinegar to remove any dirt or pests. This step ensures the produce stays fresh longer. I then pat it dry and store it in a breathable bag in the refrigerator.
Proper storage keeps the vegetable crisp and flavorful for up to a week. If I notice any wilting, I trim the stems and place them in a bowl of cold water to revive them. This method works wonders for maintaining freshness.
- Harvest when buds are tight and deep green.
- Cut the head 5-6 inches below the stem to encourage side shoots.
- Rinse with vinegar water to remove dirt and pests.
- Store in a breathable bag in the refrigerator for up to a week.
By following these steps, you’ll enjoy a bountiful yield and keep your garden productive throughout the season. Happy harvesting!
Pest and Disease Management for Healthy Broccoli
Keeping your broccoli healthy involves more than just watering and sunlight. Pests and diseases can quickly damage your plants if not managed properly. Early detection and organic solutions are key to maintaining a thriving garden.
Identifying Common Pests and Troubleshooting
Common pests like cabbage loopers and imported cabbageworms can wreak havoc on your plants. Look for holes in the leaves or chewed edges. Aphids are another frequent issue, often found on the undersides of leaves.
Regular inspection is crucial. I check my plants every few days for signs of infestation. Early detection allows for quick action, preventing widespread damage.
Organic Control Methods and Natural Remedies
For organic pest control, I rely on neem oil and diatomaceous earth. Neem oil is effective against a wide range of pests, while diatomaceous earth deters crawling insects. Both are safe for the plant and the environment.
Here’s a quick guide to organic remedies:
| Pest | Organic Solution |
|---|---|
| Cabbage Loopers | Neem Oil |
| Aphids | Diatomaceous Earth |
| Imported Cabbageworms | Bacillus Thuringiensis |
Garden hygiene is also important. Remove any fallen leaves or debris that could harbor pests. Regularly clean your container and tools to prevent disease spread.
By using these methods, you can keep your garden healthy and productive. Organic solutions ensure a chemical-free environment, benefiting both your plants and the ecosystem.
Creative Ideas for Companion Planting and Recipes
Companion planting is a game-changer for maximizing space and improving the health of your garden. By pairing the right plants together, you can boost growth, deter pests, and enhance flavor. Let’s explore some creative ideas to make the most of your container garden.
What Not to Plant Next to Broccoli and Ideal Companions
Certain plants can hinder the growth of broccoli. Avoid planting it near other brassica family members like cabbage or cauliflower. These plants share similar pests and compete for nutrients. Instead, choose companions that benefit broccoli’s growth.
Onions, garlic, and celery are excellent partners. They repel pests and improve soil health. Potatoes and beans also work well, as they don’t compete for the same nutrients. Here’s a quick comparison:
| Ideal Companions | Plants to Avoid |
|---|---|
| Onions | Cabbage |
| Garlic | Cauliflower |
| Celery | Strawberries |
Experimenting with different arrangements can maximize space and yield. I’ve found that interplanting herbs like dill or rosemary adds both flavor and pest protection.
Creative Recipe Ideas for Home-Grown Broccoli
Harvesting your own broccoli opens up a world of culinary possibilities. One of my favorite recipes is a simple roasted broccoli with garlic and lemon. Toss the florets in olive oil, season with salt and pepper, and roast at 400°F for 20 minutes. Finish with a squeeze of fresh lemon juice.
For a heartier dish, try broccoli and cheddar soup. Sauté onions and garlic, add chopped broccoli, and simmer in vegetable broth. Blend until smooth, stir in shredded cheddar, and serve with crusty bread. The fresh flavor of home-grown broccoli shines in every bite.
Companion planting not only improves your garden’s health but also enhances your meals. By pairing the right plants and trying new recipes, you’ll enjoy a bountiful and delicious harvest.
Conclusion
Embarking on a gardening journey with fresh, homegrown produce is both rewarding and accessible. From selecting the right container to harvesting your first head, this guide has covered every step to ensure success. With proper care, you can enjoy a bountiful yield even in limited spaces.
Remember, the key lies in choosing the right soil, providing adequate sunlight, and maintaining consistent watering. Regular monitoring for pests and diseases ensures your plant stays healthy throughout the season. Whether you’re a beginner or an experienced gardener, these tips will help you achieve a thriving garden.
Still curious? Questions like “How many plants fit in a 5-gallon bucket?” or “Can dogs eat broccoli?” are common and worth exploring. Start your journey today and experience the joy of harvesting your own fresh produce. Happy gardening!


