Have you ever wondered if you can cultivate a nutritious and versatile vegetable like okra right in your backyard or balcony? The answer is a resounding yes! I’ve discovered that with the right techniques, it’s not only possible but also incredibly rewarding.
When I first started my journey into gardening, I was skeptical about growing okra in limited spaces. However, I quickly realized that using a 5-gallon pot with a depth of 10-12 inches is ideal for this plant. The black container I chose helped absorb heat, which okra thrives on.
Okra is a powerhouse of nutrients, packed with vitamins and low in calories. It’s also surprisingly easy to grow, making it perfect for beginners. Whether you’re short on space or just want to try something new, this guide will walk you through the process step by step.
In this article, I’ll share my personal tips and tricks to help you successfully grow okra at home. From choosing the right container to harvesting your first crop, you’ll find everything you need to get started.
Key Takeaways
- Okra grows well in containers with proper care and the right setup.
- A 5-gallon pot with a depth of 10-12 inches is ideal for healthy root development.
- Black containers are recommended for better heat absorption.
- Okra is low in calories and rich in vitamins, making it a nutritious addition to your diet.
- Container gardening is a great option for small spaces or beginners.
Introduction to Container Gardening with Okra
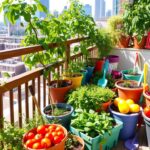
Ever thought about how to grow okra even if you don’t have a large garden? I was in the same boat until I discovered the magic of container gardening. This method allows you to cultivate this nutrient-packed vegetable in small spaces, like balconies or patios.
Why I Chose Container Gardening for Okra
When I first started, I was drawn to container gardening because of its flexibility. Okra, with its taproot system, can be tricky to manage in traditional gardens. Containers give you control over soil quality, drainage, and space, making it easier to meet the plant’s needs.
Another reason I chose this method is the ability to move the plant to warmer spots. Okra thrives in heat, and containers allow you to position it where it gets the most sunlight. This flexibility was a game-changer for me.
Overview of Okra’s Benefits and Challenges
Okra is a powerhouse of nutrients, rich in vitamins A, C, and K. It’s also low in calories, making it a healthy addition to any diet. However, growing it comes with its own set of challenges.
One of the biggest hurdles is managing the plant’s taproot. It requires deep soil, which is why a container with a depth of 10-12 inches is ideal. Proper watering is also crucial—too much or too little can stunt growth.
Another challenge is ensuring warm conditions. Okra seeds won’t germinate in cool soil; the temperature must be at least 70°F. This is where container gardening shines, as you can easily control the environment.
| Benefit | Challenge |
|---|---|
| Rich in vitamins A, C, and K | Taproot requires deep soil |
| Low in calories | Needs consistent watering |
| Thrives in warm conditions | Soil temperature must be ≥70°F |
So, what’s the secret to growing okra? It’s all about understanding the plant’s needs and adapting your approach. Container gardening offers a practical solution to many traditional challenges, making it a great option for beginners and seasoned gardeners alike.
Essential Setup for Growing Okra in Containers
Setting up the right environment for your okra plant is the first step to a successful harvest. With the right pot, soil, and care, you can create the perfect conditions for this heat-loving vegetable to thrive.
Choosing the Perfect Pot
Selecting the right container is crucial. I recommend a 5-gallon pot with a depth of at least 10-12 inches. This size supports the plant’s taproot system, ensuring healthy growth. A black-colored pot is ideal because it absorbs heat, which okra loves.
Soil, Fertilizer, and Watering
Use a loamy, well-draining soil mix enriched with compost. This provides the nutrients your plant needs. For fertilizer, opt for a low-nitrogen option to avoid excessive leafy growth. Water consistently, keeping the soil moist but not waterlogged.
“A balanced soil mix and proper watering are key to a healthy okra plant.”
Sunlight and Temperature
Your plant needs full sun for at least 5-6 hours daily. Measure sunlight exposure using a simple indicator like a marked stick. Maintain temperatures between 75-95°F for optimal growth. A black pot helps retain heat, especially in cooler climates.
| Factor | Recommendation |
|---|---|
| Pot Size | 5-gallon, 10-12 inches deep |
| Soil Type | Loamy, well-draining, enriched with compost |
| Fertilizer | Low-nitrogen, balanced formula |
| Watering | Keep soil uniformly moist |
| Sunlight | 5-6 hours of full sun daily |
| Temperature | 75-95°F |
By following these guidelines, you’ll create the ideal environment for your plant to flourish. Whether you’re a beginner or an experienced gardener, this setup ensures a bountiful harvest.
Tips for Growing Okra in Containers
Starting your okra journey in a pot can be both simple and rewarding. With the right approach, you can enjoy a bountiful harvest even in limited spaces. Here’s how to get started.
How to Plant Okra Seeds in Pots
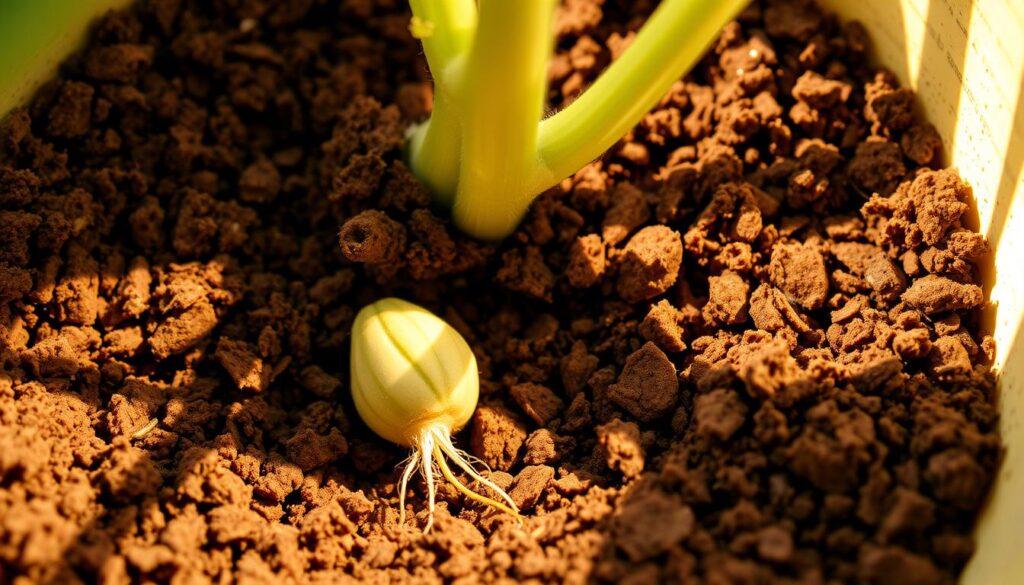
Planting seeds correctly is the foundation of a healthy plant. I recommend planting 2-3 seeds per pot at a depth of ½ to 1 inch. This ensures enough space for germination while preventing overcrowding.
Soaking seeds overnight in warm water can speed up germination. This softens the seed coat, allowing moisture to penetrate more easily. After soaking, plant them in a well-draining soil mix enriched with compost.
Biodegradable pots are a great option for direct sowing. They reduce transplant shock and allow roots to grow freely. Just make sure your pot has proper drainage to prevent waterlogging.
Selecting Dwarf vs. Standard Okra Varieties
Choosing the right variety is crucial for success. Dwarf varieties, like ‘Baby Bubba,’ are ideal for pots because they grow to about 3-4 feet tall. They’re compact and easier to manage in small spaces.
Standard varieties, such as ‘Clemson Spineless,’ can reach up to 6 feet. While they produce more pods, they require larger pots and more maintenance. For beginners, I suggest starting with a dwarf variety.
Steps to Ensure a Healthy Seed Germination
Healthy germination starts with the right conditions. Keep the soil temperature above 70°F, as cooler temperatures can delay sprouting. Use a heat mat if needed to maintain warmth.
Water consistently but avoid overwatering. The soil should stay moist but not soggy. Once seedlings emerge, thin them to one strong plant per pot to avoid competition for nutrients.
“Pre-soaking seeds and maintaining warm soil are the secrets to fast germination.”
By following these steps, you’ll give your seeds the best chance to thrive. Whether you’re a beginner or an experienced gardener, these tips will help you achieve a successful start.
Okra Plant Care and Germination Secrets
Unlocking the secrets to successful okra germination can make all the difference in your gardening journey. From soaking seeds to monitoring growth, every step plays a crucial role in ensuring a healthy plant. Let’s dive into the techniques that can help you achieve faster germination and robust growth.
Why Soak Okra Seeds and the Benefits of Soaking
Soaking seeds before planting is a game-changer. It softens the seed coat, allowing moisture to penetrate more easily. This process can reduce germination time from 10 days to as few as 5 days. I’ve found that soaking seeds for 24 hours in warm water yields the best results.
This method not only speeds up germination but also ensures more even sprouting. Without soaking, seeds may take longer to germinate or fail to sprout altogether. It’s a simple yet effective tip that can save you plenty of frustration.

Fast Germination Techniques and What Happens Without Soaking
To achieve fast germination, maintain a soil temperature above 70°F. Use a heat mat if necessary, especially in cooler climates. After soaking, plant the seeds in a well-draining soil mix and keep the soil consistently moist.
If you skip soaking, you risk delayed or uneven germination. Seeds may struggle to absorb enough moisture, leading to weaker seedlings. In my experience, giving seeds this extra care during the early season sets the stage for a healthier plant.
Additional Care Tips During Growth and Bloom
Once your seeds have sprouted, it’s essential to monitor them closely. Water regularly, ensuring the soil stays moist but not waterlogged. During flowering, maintain consistent moisture levels to support fruit development.
Here are some key steps to follow:
- Check seedlings daily and water as needed.
- Adjust care based on the changing season and growth stage.
- Provide plenty of sunlight and warmth for optimal growth.
“Consistent moisture and warmth are the cornerstones of successful okra germination and growth.”
By giving your okra plant plenty of attention during these early days, you’ll set the foundation for a bountiful harvest. Whether you’re a beginner or an experienced gardener, these techniques will help you achieve long-term success.
Companion Planting and Potential Pairings
Companion planting can transform your garden by boosting yields and keeping pests at bay. By strategically pairing plants, you can create a healthier, more productive environment for your crops. Let’s explore which plants work well with okra and which ones to avoid.
What Not to Plant Next to Okra
Some plants can hinder okra’s growth or attract pests. Avoid planting squash or sweet potatoes nearby, as they can attract root-knot nematodes. These pests can damage the root system and reduce fruit production.
Vine crops like watermelon or cucumber can also compete for space and nutrients. Keep these at a distance to ensure your okra has enough room to thrive.
Enhancing Your Harvest with Beneficial Companion Plants
Certain plants can improve okra’s health and yield. Basil, for example, repels pests like aphids and spider mites. Its strong aroma acts as a natural deterrent, keeping your garden pest-free.
Pepper and tomato plants are also great companions. They don’t compete for resources and can help deter harmful insects. Plus, they add variety to your garden and enhance overall productivity.
Here are some tips for successful companion planting:
- Space plants at least 10 inches apart to avoid overcrowding.
- Monitor plant height to ensure taller plants don’t shade okra.
- Choose dwarf varieties for small spaces to maximize efficiency.
“Strategic pairings can boost your garden’s health and yield, making companion planting a must-try technique.”
By carefully selecting companions, you can create a balanced ecosystem that supports your okra’s growth. Whether you’re working with a small space or a larger garden, these strategies will help you achieve a bountiful harvest.
Conclusion
Growing fresh vegetables at home doesn’t have to be complicated, even in limited spaces. With the right setup, you can enjoy a bountiful harvest of nutrient-packed produce. Start by choosing a 5-gallon pot with proper depth to support the plant’s roots. Use nutrient-rich, well-draining soil and ensure your garden gets at least 5-6 hours of full sun daily.
Watering is key—aim for about an inch per week to keep the soil moist but not waterlogged. Soaking seeds before planting can speed up germination, giving your plant a strong start. Pairing your crop with companion plants like basil or peppers can help deter pests and improve overall health.
Harvest pods when they’re 3-5 inches long for the best flavor. Regular picking encourages more fruit production throughout the season. Whether you’re a beginner or an experienced gardener, this method is a rewarding way to enjoy fresh, homegrown vegetables.
So, why wait? Grab a pot, some seeds, and start your own small-space garden today. With a little care and patience, you’ll soon have plenty of delicious pods to enjoy!


